+86-0577 56666518 info@tinsi-steel.cn


Quality Test Of TINSI-STEEL
|
PMI test |
Positive Material Identification(PMI) chemical composition thus determined shall conform to the requirements . |
|
Dimension & |
Measure OD,ID,Wall Thickness,Straightness, Length(inch /mm) and inspection make sure tube surface no cracks and pits |
|
Surface Roughness Test |
precision or sanitary tube or some special requirements for surface,surface roughness tester use highly sophisticated inductance sensor approach looking at peaks and valleys,most popular parameter is Ra,plus Rz, Rq, Rt. |
|
Tensile Test |
This is probably the most revealing of the mechanical tests that can be performed upon a specimen of pipe or tubular product material. A longitudinal specimen1 of known cross sectional area is taken from the material and gripped at each end, and then pulled apart until fracture occurs. |
|
Flaring Test |
This is an alternative to the flange test for certain types of pressure tube. A cone is forced into the end of the tube. The end of the tube is expanded by a specified increase in diameter without splits or cracks.The included angle of drift is also specified. |
|
Flattening Test |
This is usually applied to tube and involves flattening a sample of tube between two parallel faces without the tube showing flaws or cracks.The length of the test piece and degree to which it is to be flattened (i.e. the distance between the parallel faces)are specified. |
|
Metallographic Inspection |
The microstructure of metallic materials directly affects the performance and service life of mechanical parts, metallurgical analysis is an important way to control the intrinsic quality of the mechanical parts. |
|
Hardness Tests(general choose one among) |
|
|
Brinell Hardness Test |
A standard size hardened steel ball is indented into the surface of material by an applied standard load. The diameter of the impression is measured accurately by microscope and converted to a hardness value using tables. |
|
Vickers Diamond Hardness Test. |
This determines hardness by measuring the impression left in material by a diamond pyramid under a standard load. The impression is accurately measured, and its area calculated.The Vickers Hardness Number is calculated by dividing the load (kg) by the area of impression (mm2). |
|
Rockwell Hardness Test |
This determines hardness by measuring the depth to which a diamond cone or hardened steel ball, under specific load, penetrates the material. Two loads are used, a minor load (10kgf) and then a major load (100 or 150 kgf), the difference in indentation being used by the machine to determine the Rockwell number.The number increases with increasing hardness and is displayed or printed by the machine. Two scales are most frequently used, a B scale with a 100 kgf load and 1.588mm steel ball, and a C scale with a 150 kgf load and diamond cone. |
|
Non-destructive Tests (general choose one among) |
|
|
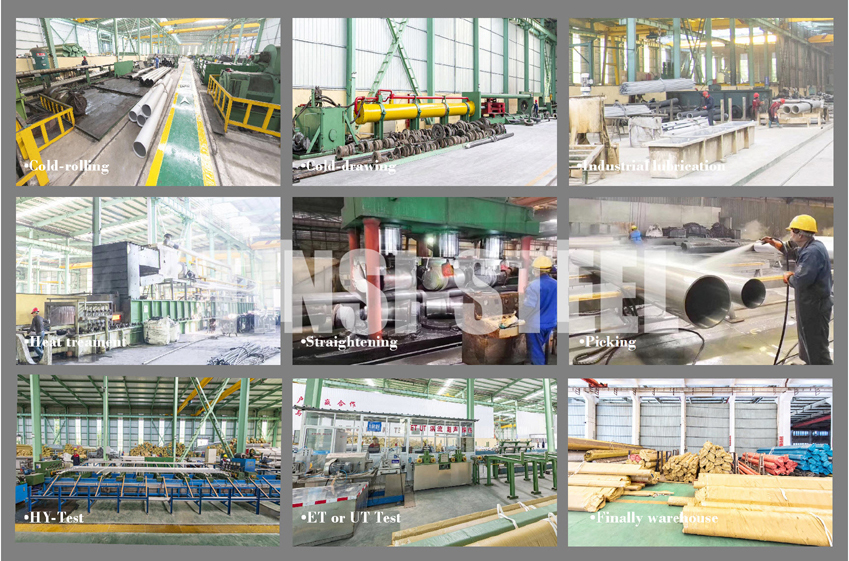
Hydrostatic Testing |
This is used to test the manufactured items under a pressure equivalent to or greater than pressure to be encountered in service. It involves filling the tube with water, which cannot be compressed, and increasing the pressure inside the tube to that specified |
|
Ultrasonic Testing |
This test involves ultrasonic sound waves being aimed, via a coupling medium, at the material to be tested. A proportion are bounced back at the interface but the remainder enter the material and bounce from the internal surface, to the external surface, where a transducer converts them into electrical energy. This is then monitored on a cathode ray tube where results are compared with those from a calibration standard. Any deviations from the standard are visible, thus indicating cracks or internal defects. |
|
Eddy-Current Testing |
This involves inducing eddy currents into the material by exciting a coil which surmounts two narrow search coils surrounding the material. Any discontinuities in material are found by comparing the electrical conditions that exist in the two search coils. The fault signals are amplified and can be shown on a cathode ray tube or as an audible signal. |
Contact: Hyman.C
Phone: 15825401620
Tel: +86-0577 56666518
Email: info@tinsi-steel.cn
Add: factory address: no272,Yongning West Road,Xiping Street, Songyang,Li shui,China